Business-Consultant-Finder is a multi-purpose business theme with a professional, lightweight, approachable design and highly extendable. Suitable to create almost any type of website such a blog, portfolio, consulting business, startup company, finance business lawyers, mentors, professional services website and WooCommerce storefront.this Elegant Themes design gives you maximum flexibility
Theme Installation
FTP Upload:
Download the .zip file. ( business-consultant-finder-pro can be downloaded from https://athemeart.com/customer-login/ after the purchase. ) And Unzip the business-consultant-finder-pro
Open up your FTP manager and connect to your hosting
Browse to wp-content/themes
Upload the business-consultant-finder-pro theme folder.
Go to Appearance > Themes in the WordPress Dashboard.
Click on the Add New button.
Click on the Upload Theme button on the top.
Use Choose File button to select business-consultant-finder-pro.zip file.
Select the theme ‘zip’ file from your computer and click Install Now Button.
After successfully installing the theme click “Activate Theme”.
Troubleshooting Possible Errors
If you encounter the message “Are you sure you want to do this? Please try again.” or “The link you followed has expired” when attempting to install, this is most likely occurring because your server has a low maximum file size upload/low maximum execution time set in the PHP settings. You must increase the following PHP settings to be greater than 24M (Any reputable hosting company will assist you with this quickly & hassle free):
upload_max_filesize – greater than 24M
post_max_size – greater than 24M
max_execution_time – greater than 100
or you can upload the theme through FTP instead to bypass this all together.
Theme Required & recommended plugins
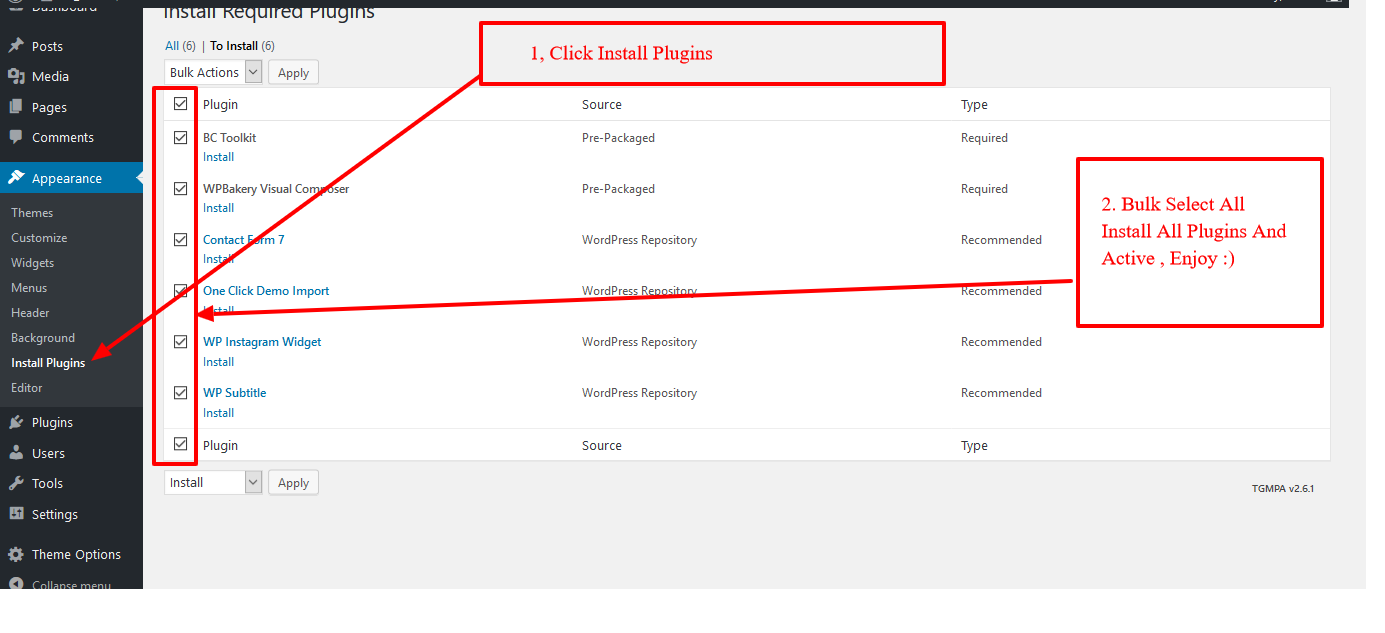
The theme uses the TGM Plugin Activation script that prompts you to install recommended plugins after you activate the theme.
The suggested recommended plugins are essential to provide the core functionality the theme relies on and/or to ease out the process of editing your website pages. You can still use the theme without these plugins, however, its functionality and your user experience would be limited.
Step 1: Go to Dashboard. You will see a notification at the top of the page asking to install the recommended plugins. Install these recommended plugins from there. Or, go to Dashboard > Plugins and you’ll see a notification.
Step 2: Then click on the Activate link under each plugin title and enjoy these plugins.
One Click Demo Content Import feature
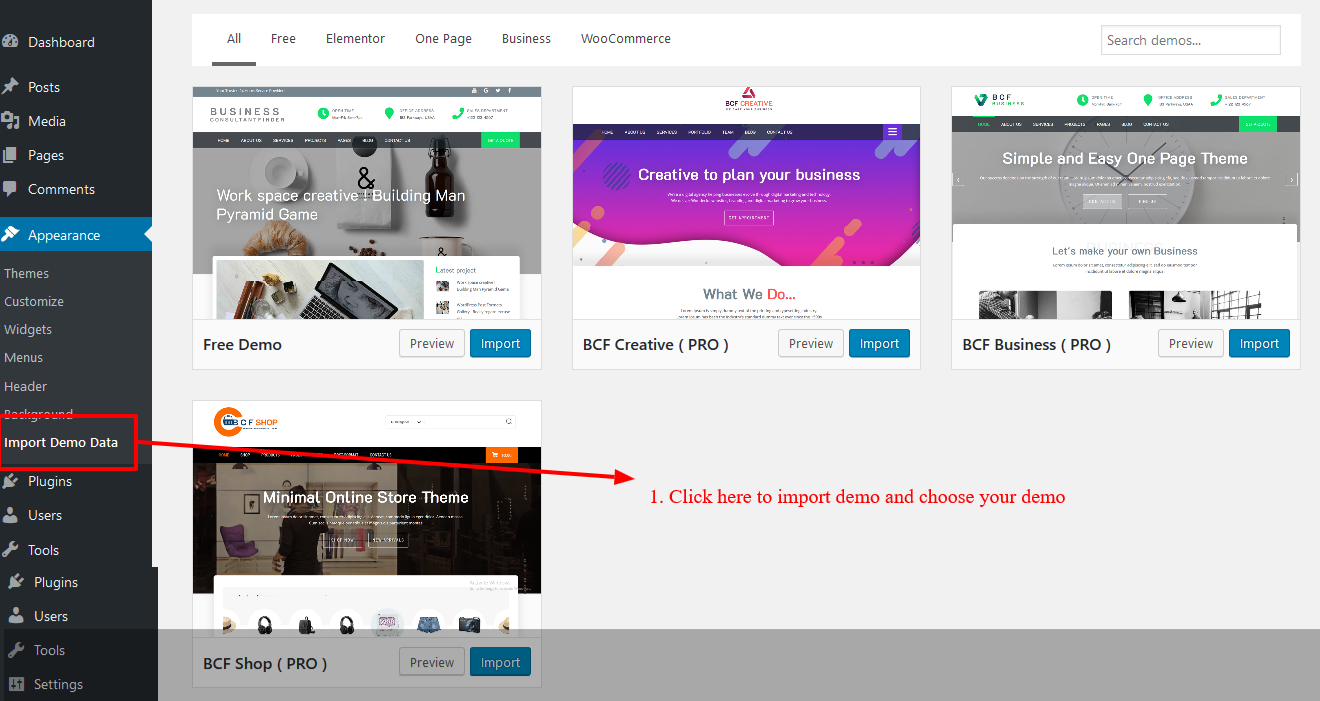
Before running the importer, make sure that you have installed and activated the required and recommended plugins. You will see a message at the top of your dashboard if you have not yet done so.
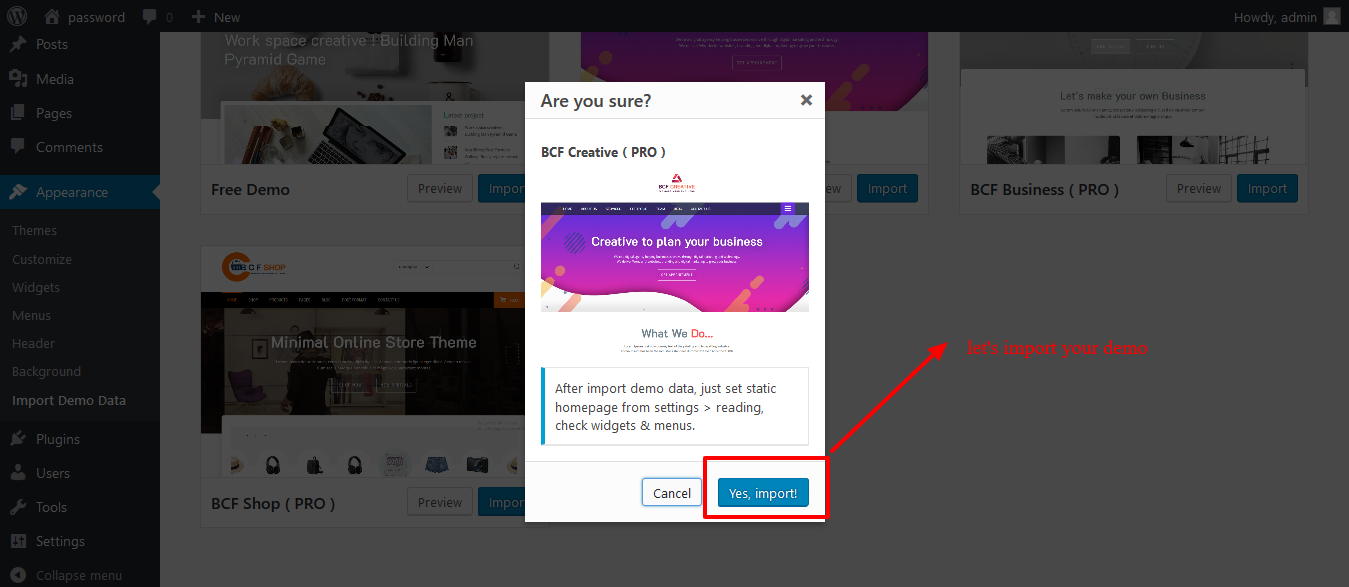
After installing and activating required One Click Demo Import plugin, head over to Appearance » Import Demo Data and run the import process.
In case you experience an issue during the one-click demo content import, please read the online information article.
Make sure to only run the Demo Importer one time. Running it multiple times will result in duplicate content.
How long should it take?
The demo import should take around 5-7 minutes to complete. There are a lot of big and beautiful images and sliders, so moving that much content can take some time. If you find that the import is taking much longer than 5-7 minutes, there’s probably a problem, and you can navigate away from the import page.
If the import does get stuck, you may need to increase the max exectution time. You can do this by adding this code to your wp-config.php file right above the “/* That’s all, stop editing! Happy blogging. */” line:
set_time_limit(600);
If you continue to have trouble, make sure that you have enough memory allocated to php. This can be set in your wp-config.php file. Try upping it to 256M. Learn about changing max memory limit.
Before running the demo import again, you should reset the database. We recommend the WordPress Reset plugin.
Alternative Importing Method
If the one click demo import does not complete or takes too long, you most likely have a memory limit on your server as explained above. Here is another method to try.
Go to Tools -> Import
Choose “WordPress” from the list.
Upload the demo.xml using the form provided on that page. The xml file can be found in the theme folder in inc/demo-import/demo.xml.
You will be asked to map the authors in this export file to users on the blog. For each author, you may choose to map to an existing user on the blog or to create a new user.
You will then have the choice to import attachments, so click on the “Download and import file attachments” box.
If the import does not fully complete, repeat these steps again as many times as necessary until you receive the Success message.
Configure Header Options
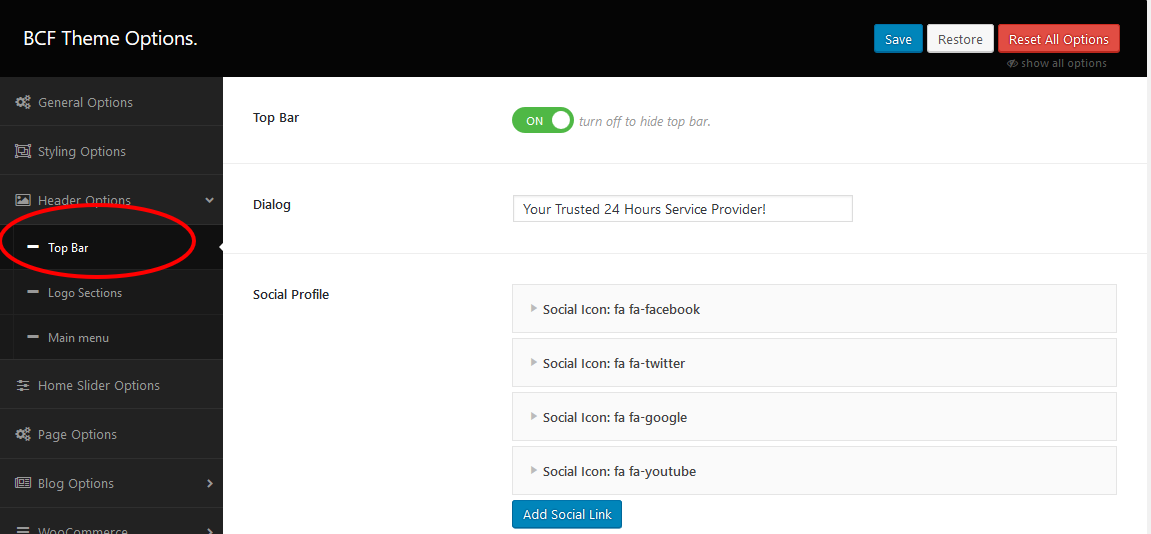
Business Consultant Finder ( PRO ) comes with an optional top bar that you can display above the header. It is useful for displaying your Logo, Company telephone number or social links .
To add content to the top bar, navigate to WordPress Dashboard >> Theme Options >> Header Options >> Top Bar .
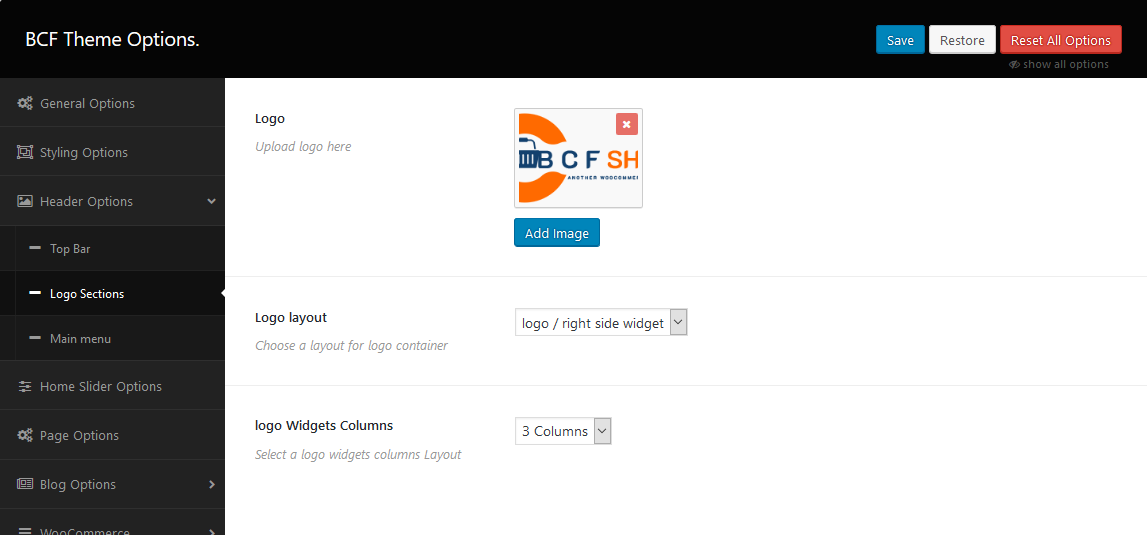
Update Logo & logo side widgets
To add /update logo and logo sidebar , navigate to WordPress Dashboard >> Theme Options >> Header Options >> Logo Sections .
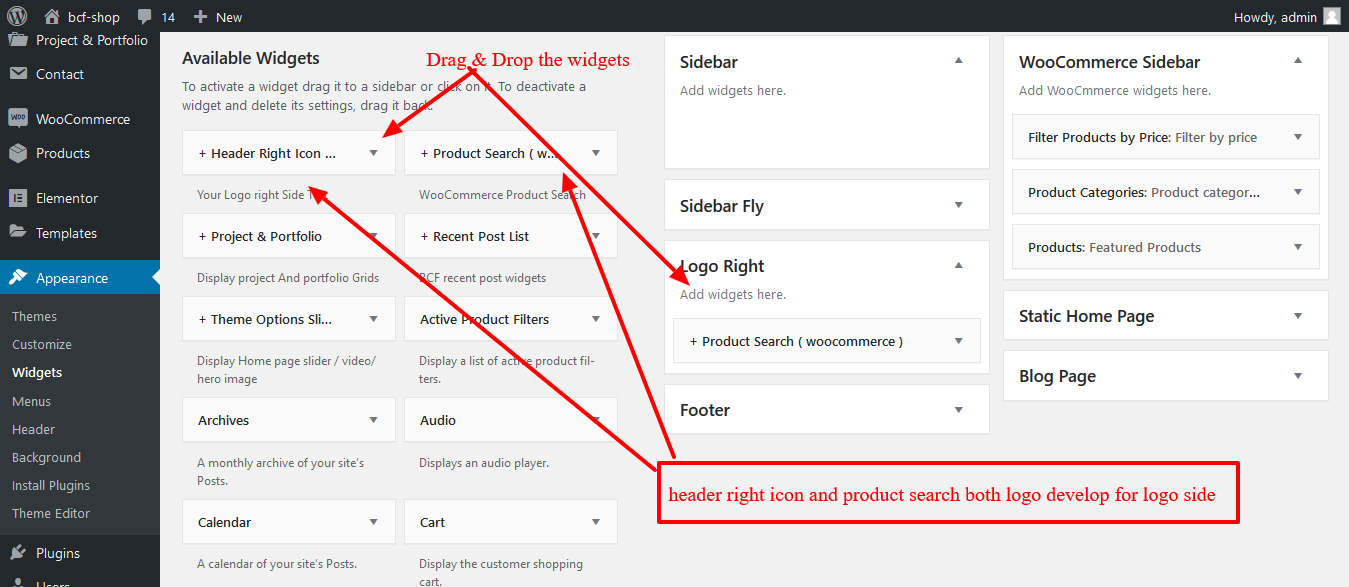
Now let's add widgets Logo Side. navigate to WordPress Dashboard >> Appearance >> Widgets
Setting Up a Homepage Page
Scroll down to bottom of page for instructions.
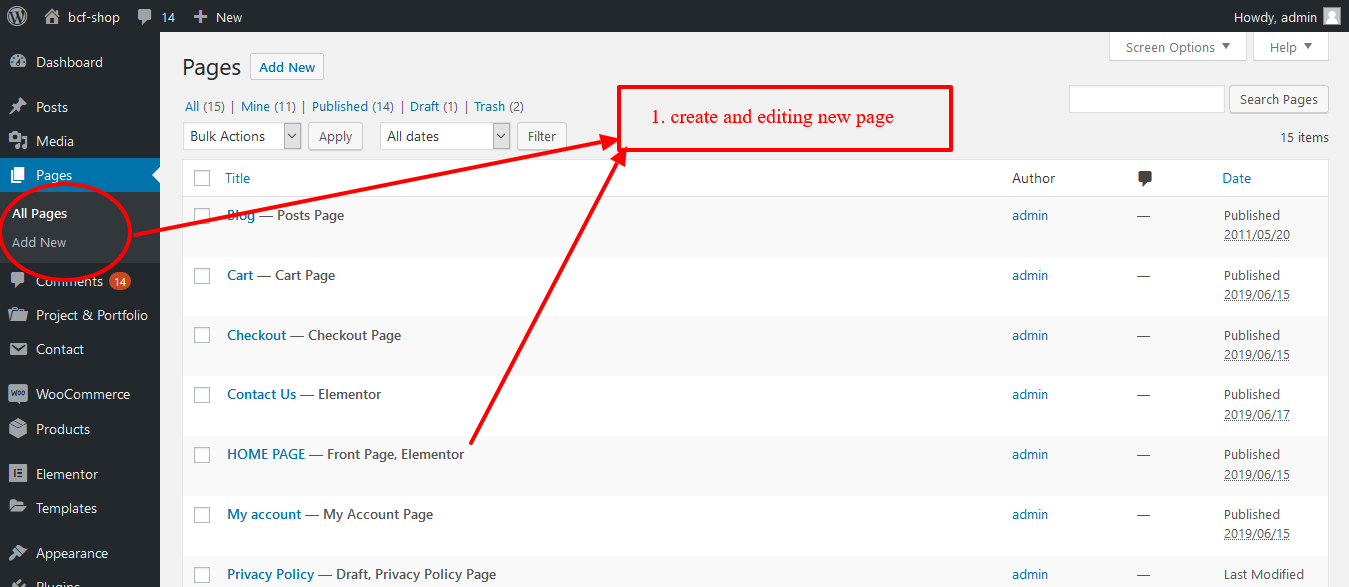
Step 1
Create (or editing) a new page by going to Pages > Add New in the WordPress Dashboard
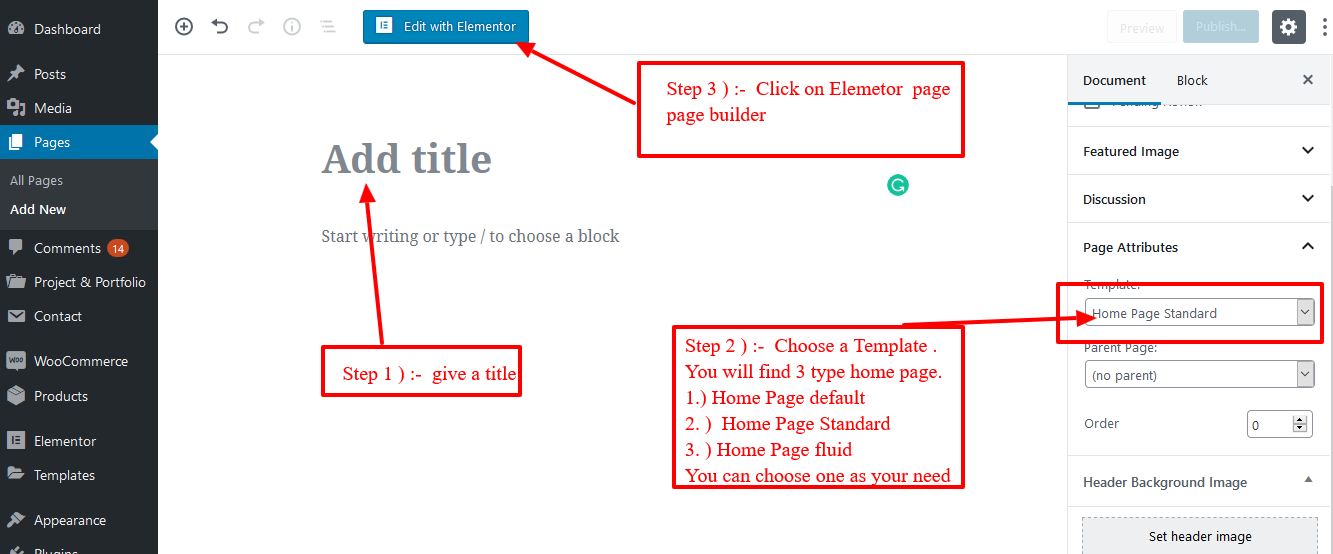
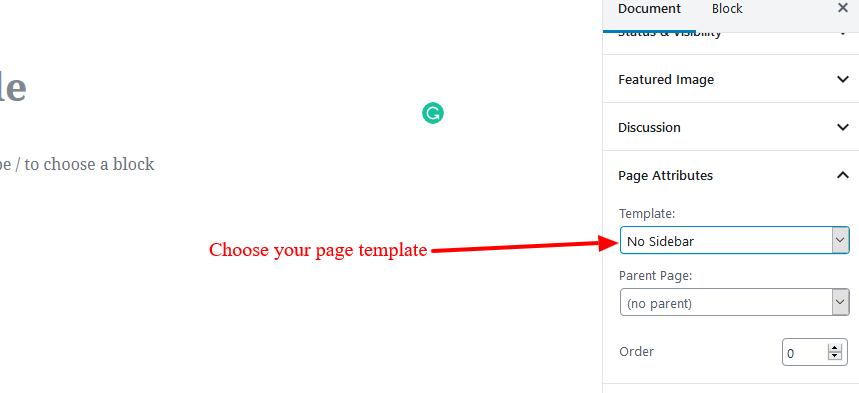
Step 2
Give it a title and Choose Page Template & Go editor elementor page builder mode.
Step 3
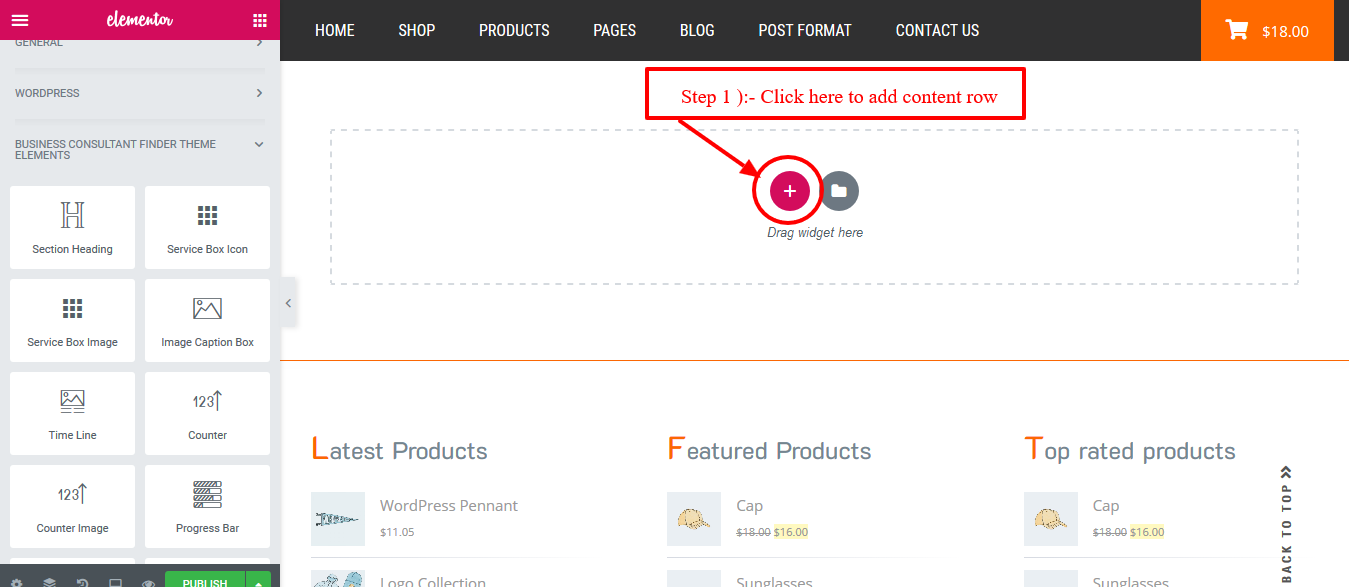
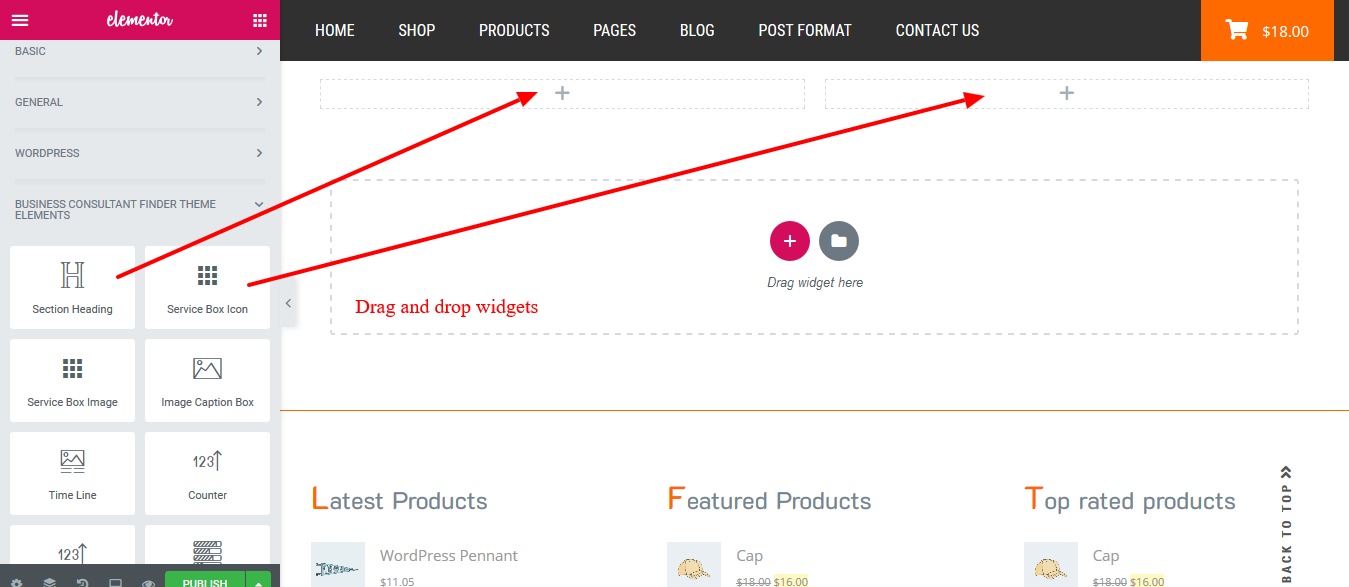
Clicking on it will launch the Elementor user interface where you can edit your page using Elementor’s drag and drop page builder.
Now you can add sections and build your page from scratch.
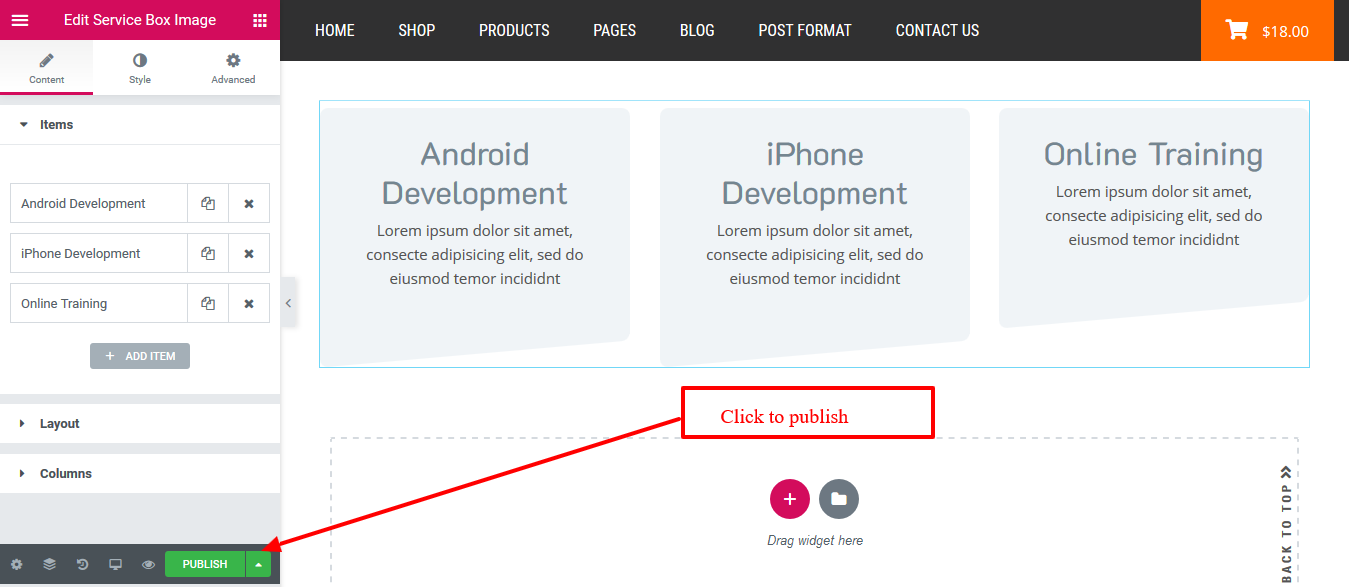
after added your widgets hit to publish button.
Learn more about elementor section , check right menu of documentation
Step 5
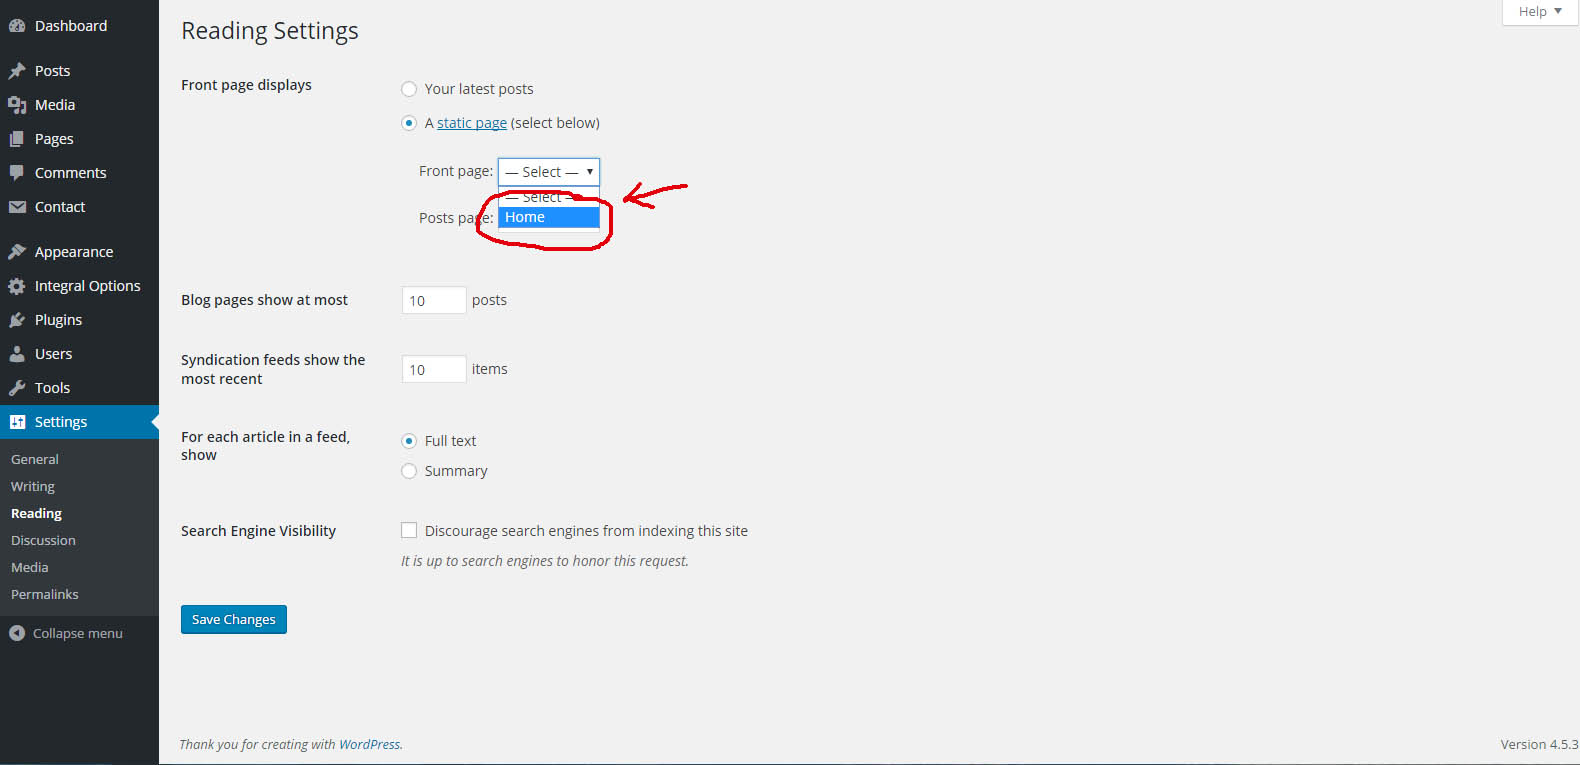
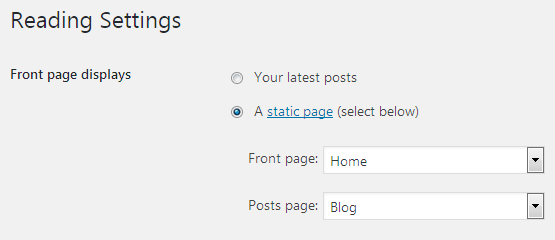
Go to Settings > Reading.
Select the homepage from dropdown list. This page will become your home/front page.
Select the posts page from dropdown list. This page will become your blog page.
That’s it, you’re done!
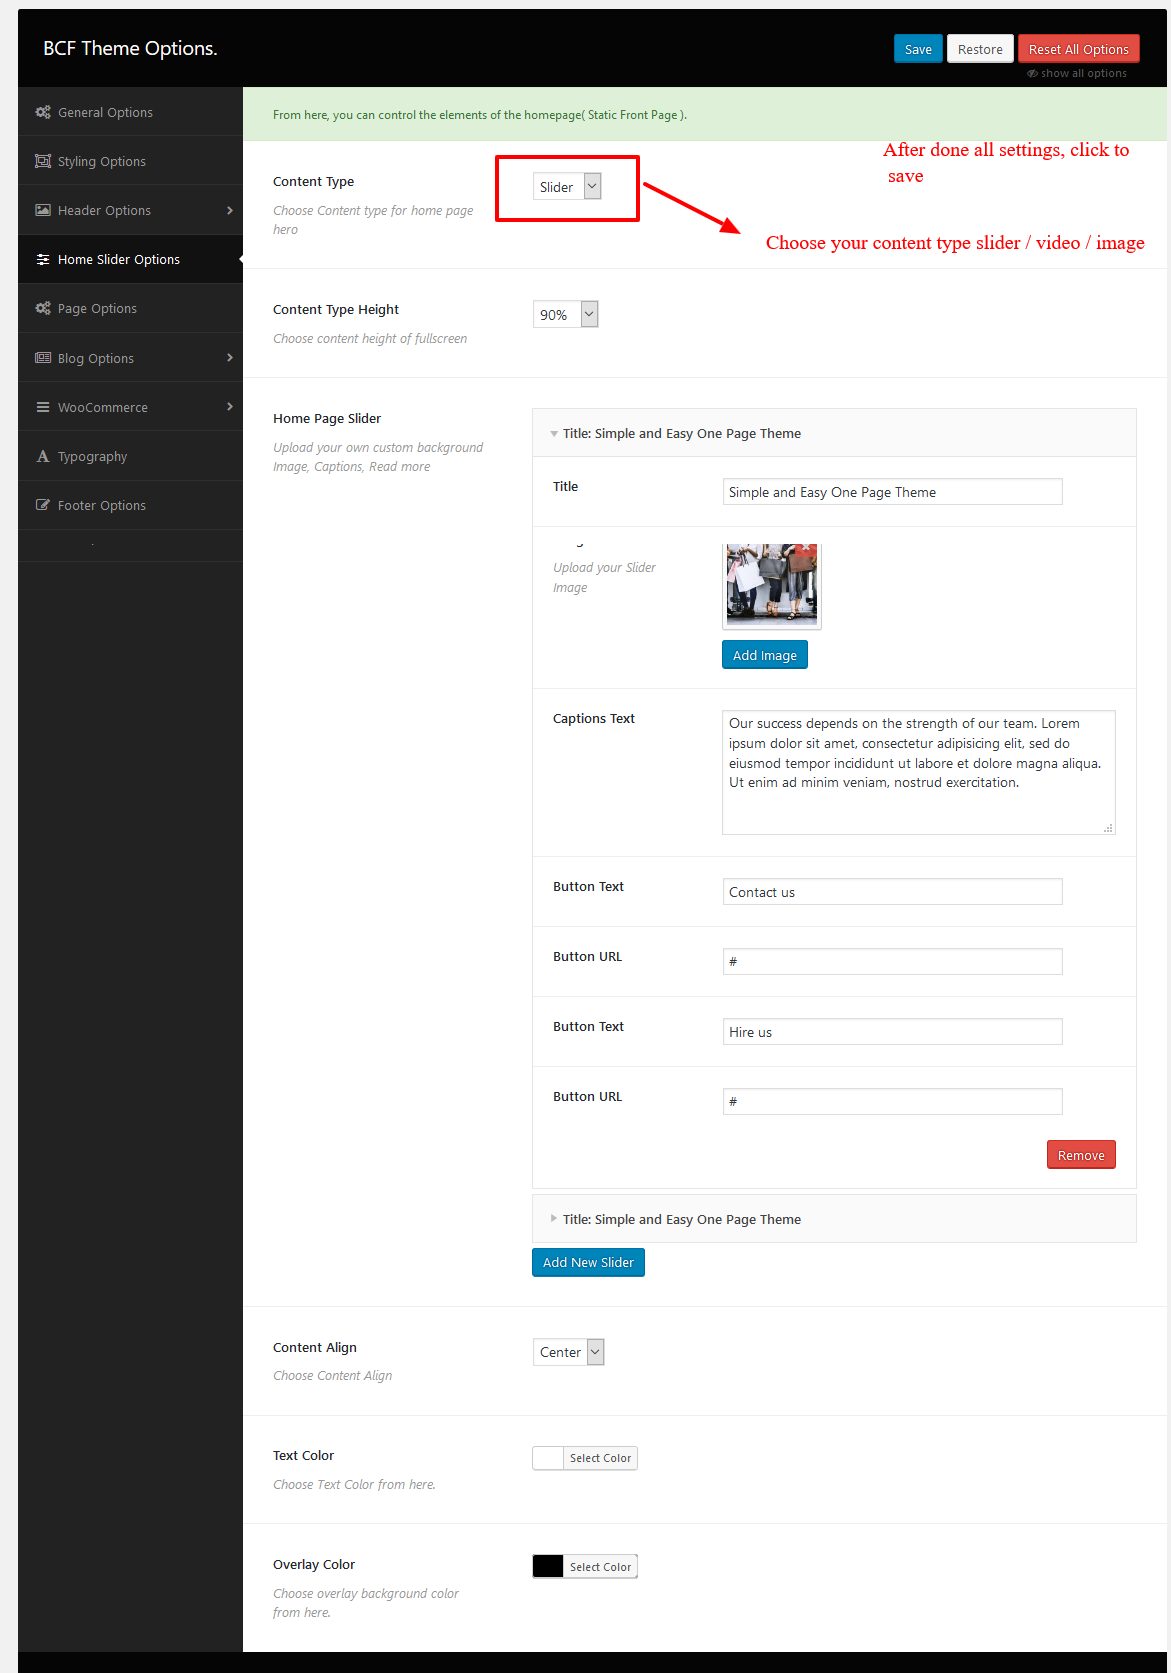
Configure Homepage Layout
How To Setup o Slider / Video / Image
let's go WordPress Dashboard >> Theme Options >> Home Slider Options >> follow up bellow Instructions
Video Instructions (How To Setup Services Offer Block on Homepage )
Page Feature
Page Templates
Since WordPress 4.7 you can use page templates also with other post types. Where appropriate, this is stated in the list below. The theme contains these useful page templates you can use out of the box:
Home Page default / Home Page Standard / Home Page fluid
This is a special page template designed for your website front page (homepage).It displays slider / video / image.
No Sidebar
if you don't like to display a sidebar on a page, use this page template with it.
Sidebar / Content
if you would like to display a sidebar on a page left side then content, use this page template with it..
Content / Sidebar
By default, sidebar displayed on pages right. However, if you would like to display a sidebar on a page content / left side, use this page template with it..
On post edit screen choose one of predefined Page Template in Page Attributes metabox on the right. The theme support these Page Template
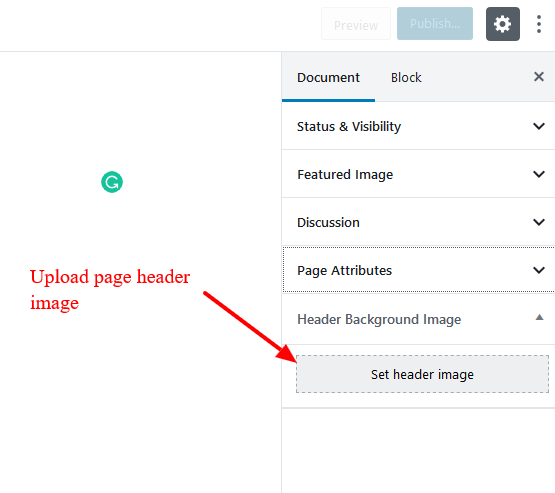
Page Header / Image
frontend view
On post edit screen choose one header image in Header Background Image metabox on the right.
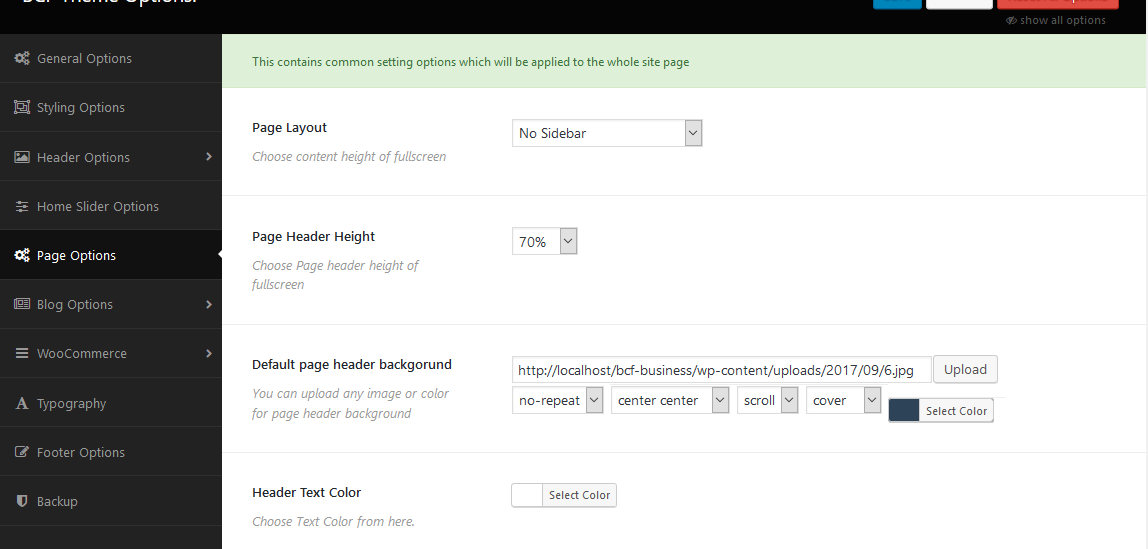
Page Global Options
To Setting up common page feature, please navigate to WordPress Dashboard >> Theme Options >> Page Options .
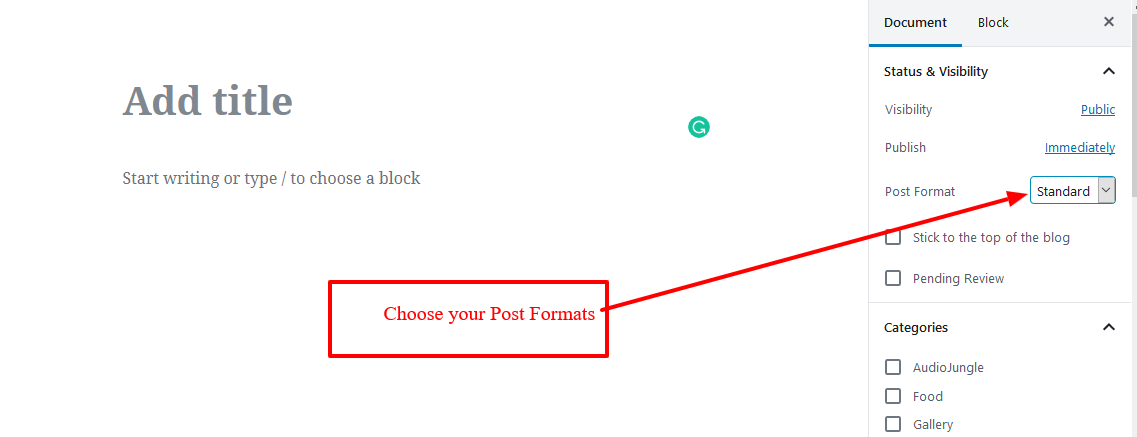
Post Formats
On post edit screen choose one of predefined post formats in Format metabox on the right. The theme support these post formats:
Standard
This is basic standard blog post layout. Featured image, if set, is displayed above the post content. Post excerpt is displayed below post title both on single post pages and in posts lists.
Displays audio player (or playlist) to play your audio files. Could be used for podcasting.
Insert your audio player (or playlist) (or embed media) anywhere in the post content. The first audio player found will be used in the post media area in posts list. The single post page will display as usual.
Insert a gallery anywhere in the post content. The first 3 gallery images will be used in slideshow in the post media area in posts list. The single post page will display as usual.
In posts list it displays a featured image, or the first image found in post content, followed with post excerpt. Font sizes in posts list are different than in default standard post format. This post format is also marked with an image icon. The single post page will display as usual.
Displays video player (or playlist) to play your video files. Could be used for video blogging.
Insert your video player (or playlist) (or embed media) anywhere in the post content. The first video player found will be used in the post media area in posts list. The single post page will display as usual.
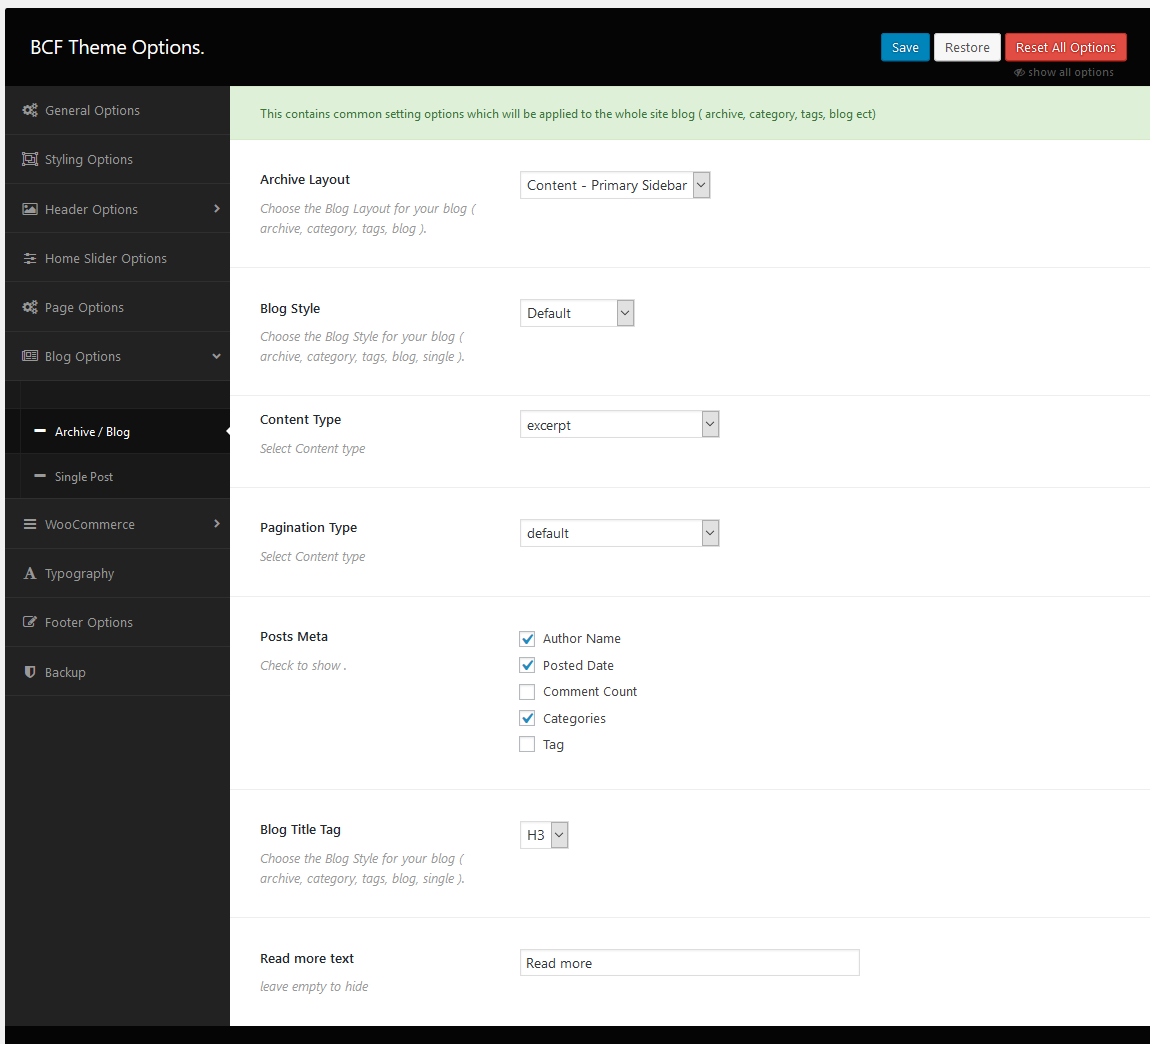
Blog Settings
This section controls the settings of the blog. You can decide if the blog shows categories, authors, date sidebar, blog publish date, view count, comments, category, blog style, content style, and much more. You can also control how many columns you want to show on the blog page. To enable social share, go to the bottom of this settings and select your desired social media you want to allow sharing.
To Setting up , navigate to WordPress Dashboard >> Theme Options >> Page Options .
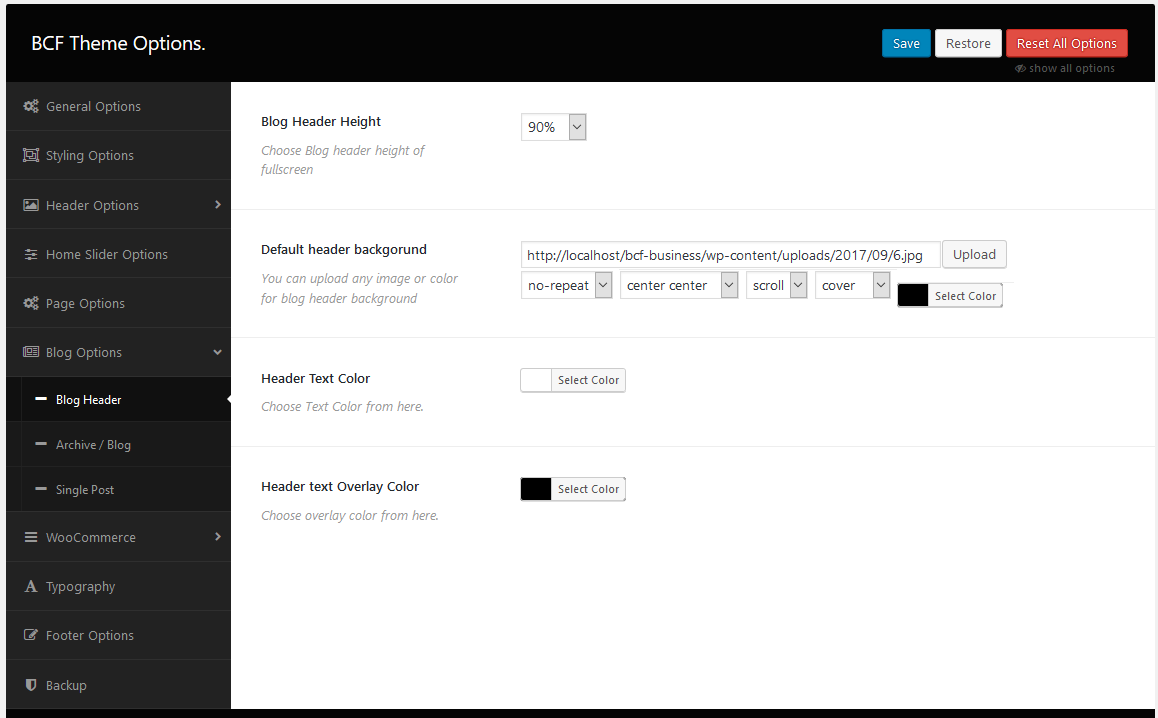
Blog Global header Settings
Blog /Archive Settings
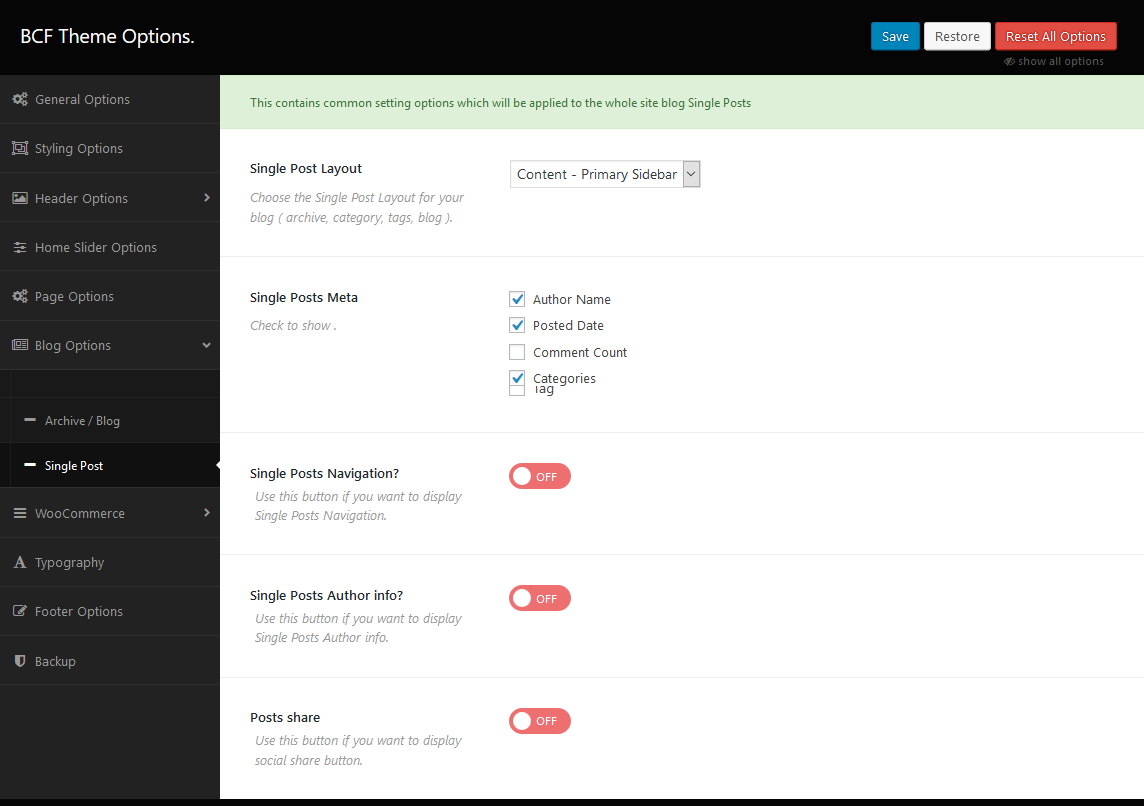
Blog Single Page Settings
WooCommerce
Business Consultant Finder is WooCommerce ready. In this are of your theme option you will be able to completely edit the WooCommerce WordPress plugin templates pages, change the header styles, texts, sidebars and page layout to make your online shop looks unique. All the Visualmodo Themes comes with the most popular e-commerce WordPress plugin, the WooCommerce and you can edit this plugins default template pages here in the case you want to build a store.
To Setting up , navigate to WordPress Dashboard >> Theme Options >> WooCommerce .
WooCommerce Global header Settings
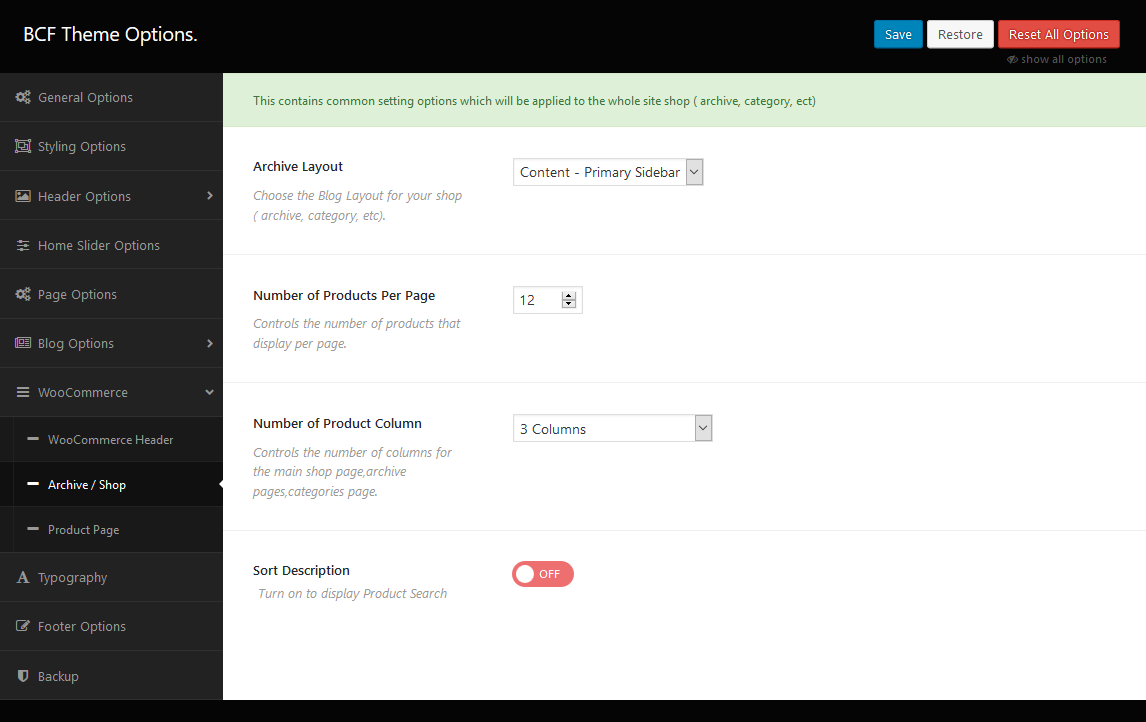
Shop / Product Archive/ Category Settings
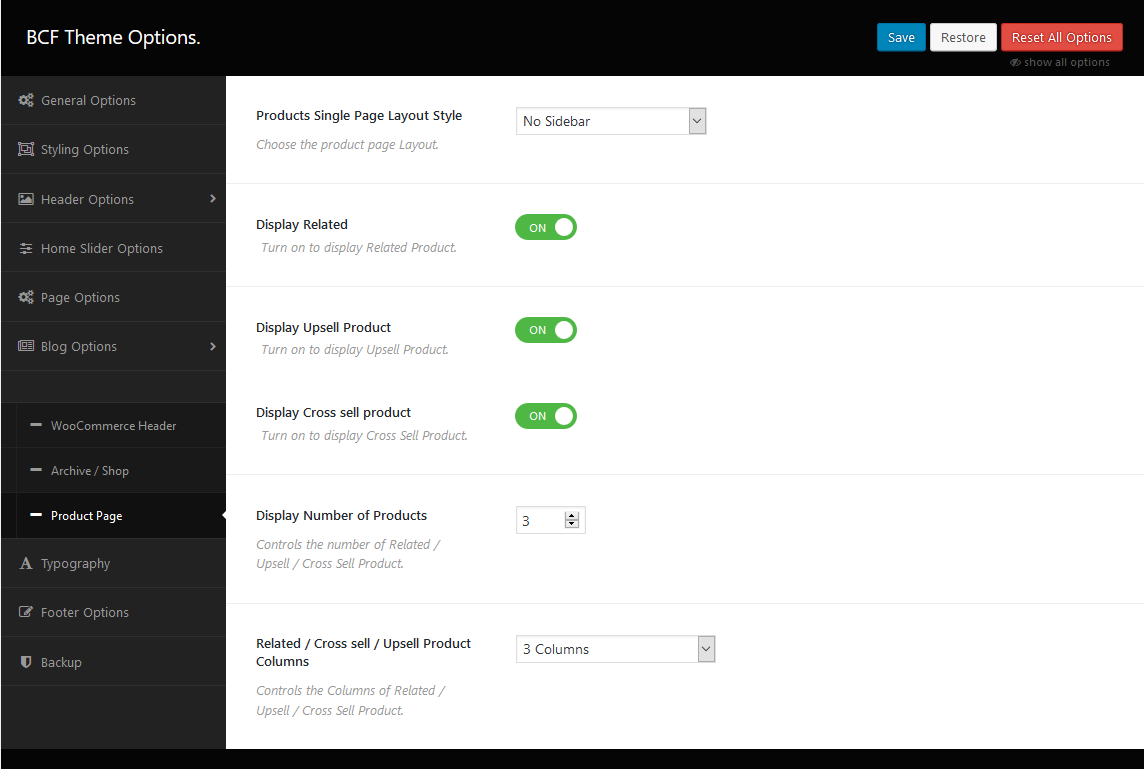
Product Single Page Settings
In the first theme options panel area, you can edit the layout for the main shop page and for the single product page, choose the sidebar location or do not use a sidebar.
Main Menu
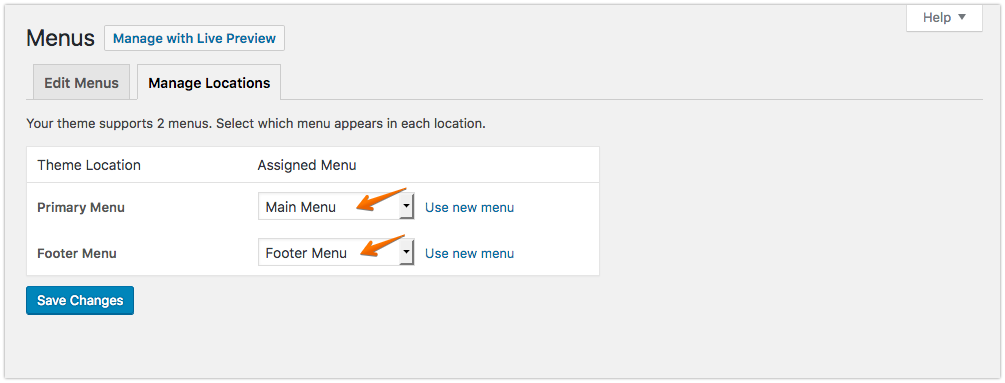
It’s an important part of the Business Consultant Finder ( PRO ) theme Installation process. First, you need to set your menu for the Primary Menu location. Go to Dashboard > Appearance > Menus, then click on Manage Locations and select/create your menu for the Primary Menu location. You can follow the below screenshot. Please follow the instructions in WordPress codex on how to create menus.
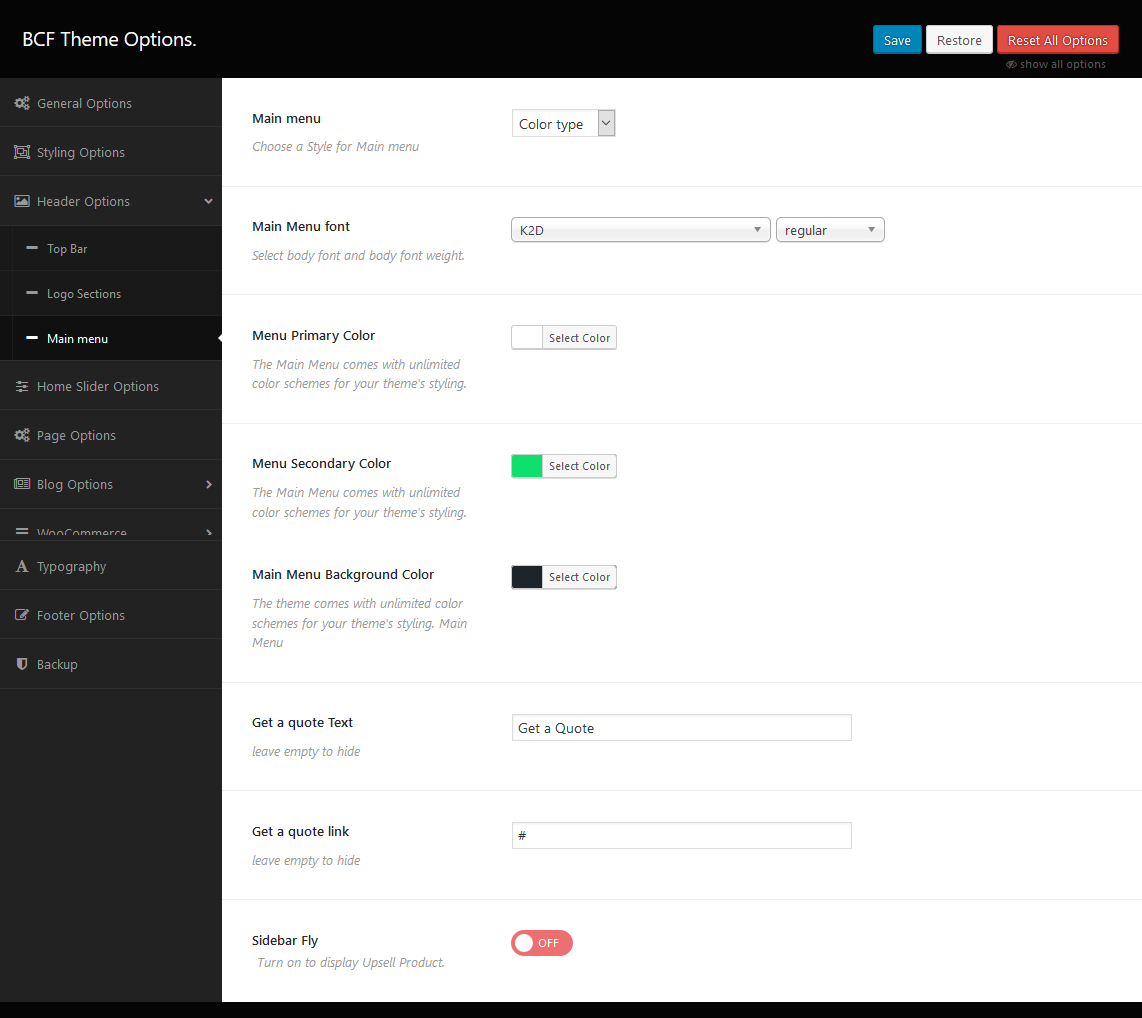
Once you set the menu up, you need to configure the main menu theme. To do so, go to Dashboard > Theme Options > Header Options > Main menu.
How to Create a Landing Page Menu with Elementor
From this tutorial you’ll learn how to create a landing page menu using anchor links, and anchor menu items to the certain content blocks. This tutorial assumes you’re using Elementor live page builder.
Creating Landing Page Menu
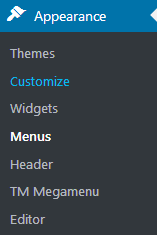
First, you need to create a menu. To do it, please, navigate to Appearance > Menus tab on the left of the Dashboard.
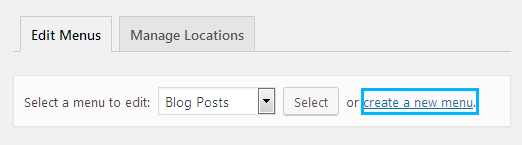
Here click Create a new menu option.
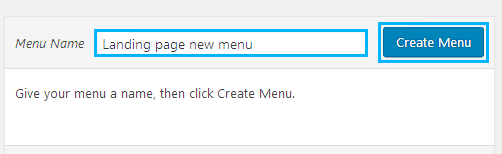
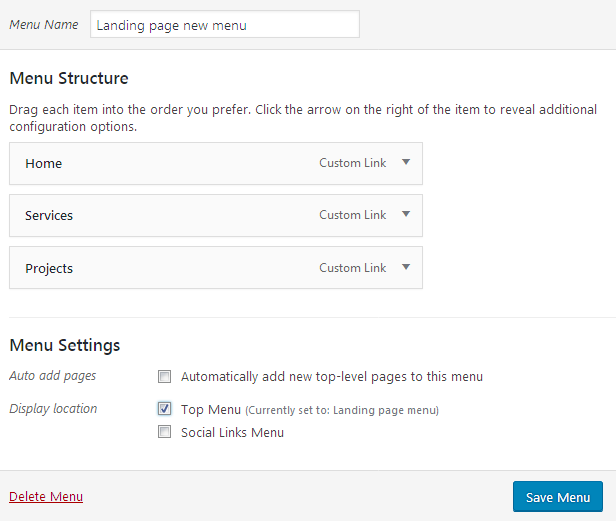
Enter the menu name in the corresponding field. Then click Create Menu button.
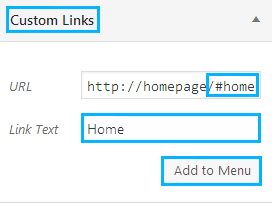
Let’s add the anchor links to it. Locate Custom Links section and input the page URL into URL field (e.g., http://your-homepage/#home). Type in the menu item title in the Link Text field. Then click Add to Menu button.
Add all the necessary menu items the same way, changing the anchors only (e.g., #about, #services, #projects, etc.).
When the menu is ready, locate Menu Settings block and select Landing Menu / Main Menu menu location (the location depends a lot on the theme you’re using).
Then click Save Menu button.
Adding Anchors to the Page Using Elementor
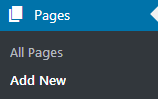
Navigate to Pages > Add New tab on the left of the Dashboard, or proceed to editing the existing home page.
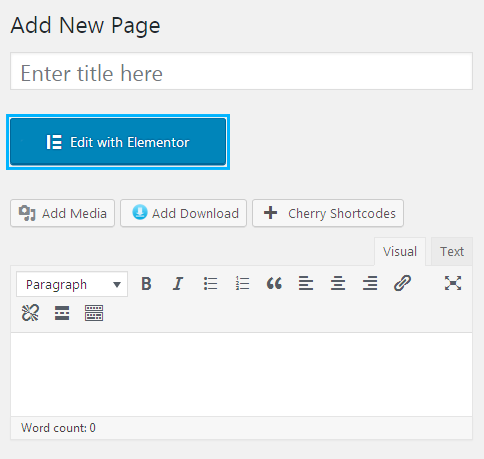
Click Edit with Elementor to edit the page using Elementor live page builder.
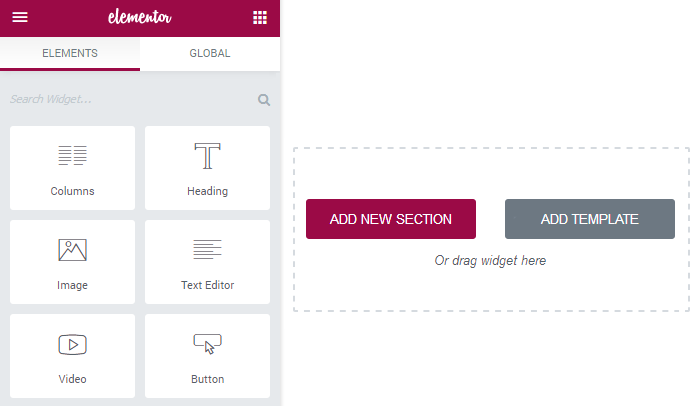
Add a new section and select a single column structure.
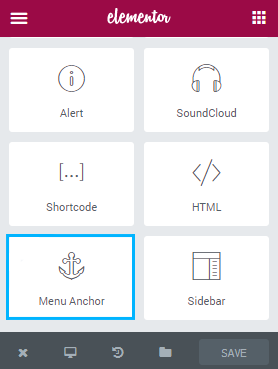
Locate General Elements block and find Menu Anchor module (you might need to scroll the list of modules to see it).
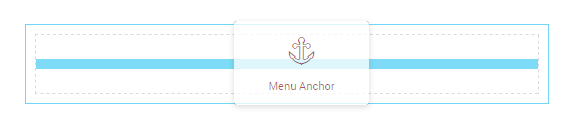
Drag and drop Menu Anchor module to the recently created column.
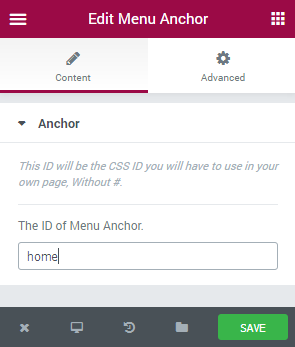
In the Content block you can see The ID of Menu Anchor. Here you need to place the anchor ID (e.g., use home ID to connect the block to #home anchor link, services ID for #services anchor link, etc.).
Click Save button in order to save the changes.
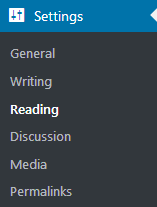
Now you need to set this page as your website’s landing page. To do it navigate to Settings > Reading tab on the left of the Dashboard.
In Front Page Displays select A static page.
Then select the newly created page with the anchor links in the Front page pages list.
Click Save Changes button.
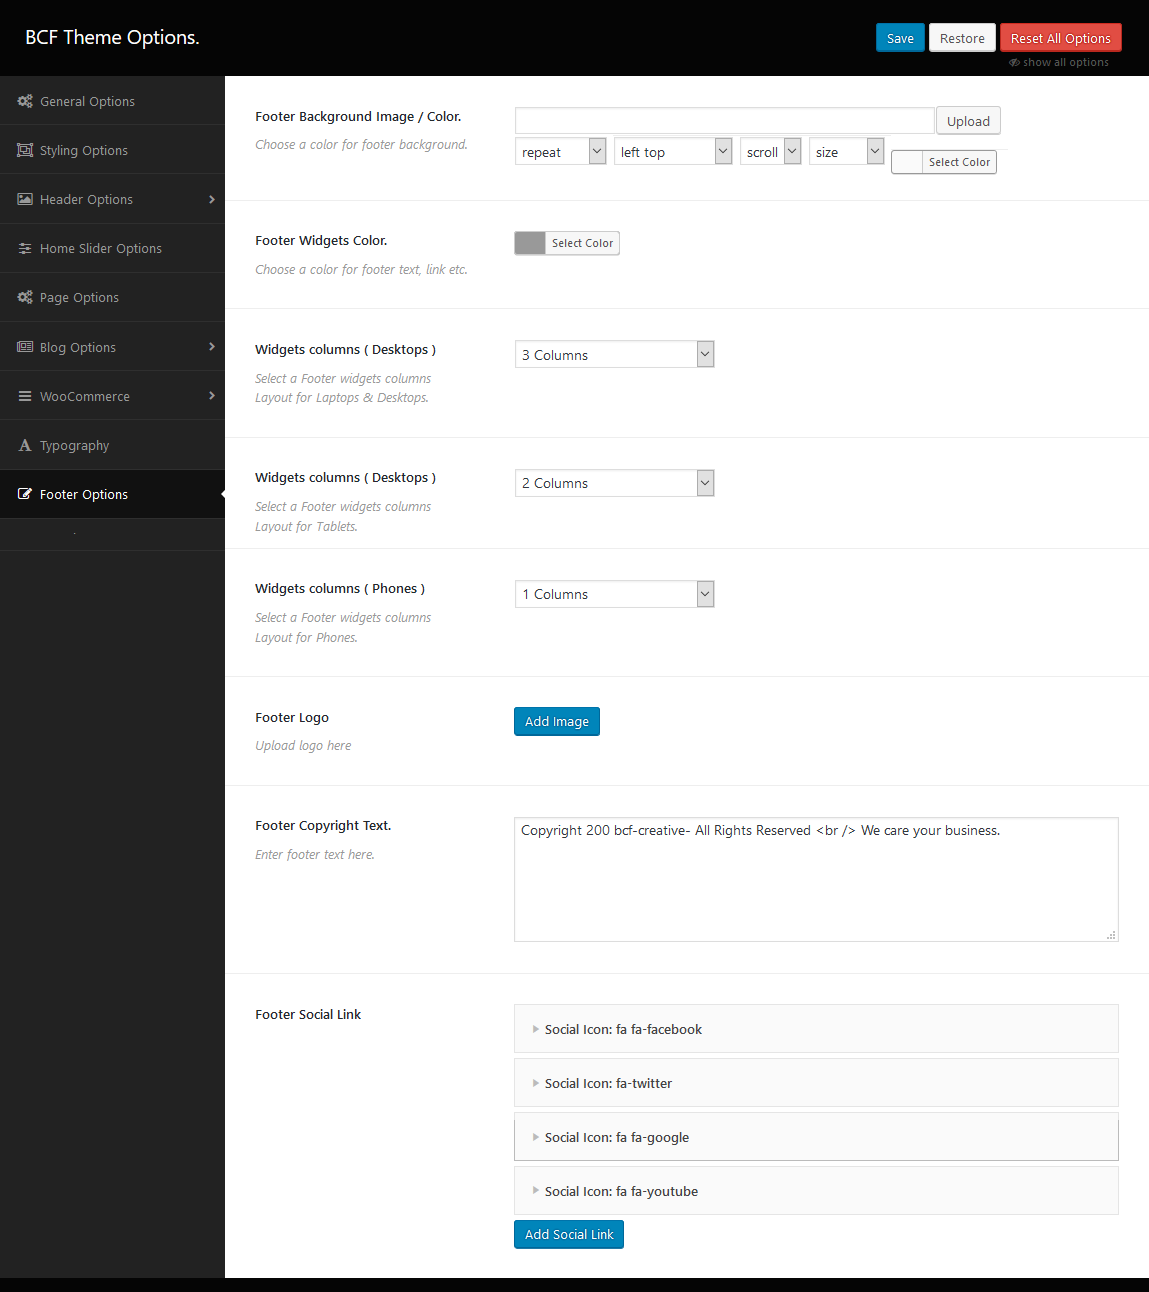
Footer Options
In this area of your site, you will be able to select your footer text, columns, footer logo, social media link & add a background image or color and layouts. In the case, you want to remove the Visualmodo default text form your footer ‘Powered by WordPress’ simply set/type your own signature text on ‘Footer Copyright Section Text’ following the attachment image.
We do our best to make your life easier with the Free support. Your feedback is valuable for us. We would love to hear from you.
If you have any suggestion, positive comments or comment of suggestion, please feel free to contact us and we'll get in touch as soon as possible.